Cara Mudah Menggunakan System Restore di Windows 7, 8, 10
Pemulihan Sistem membantu memulihkan file sistem komputer Anda ke titik waktu sebelumnya. Ini adalah cara untuk membatalkan perubahan sistem pada komputer tanpa mempengaruhi file pribadi, seperti email, dokumen, atau foto. System Restore tidak ditujukan untuk membackup file pribadi, sehingga tidak dapat membantu memulihkan file pribadi yang.

3 Ways to Use System Restore on Windows 7 wikiHow
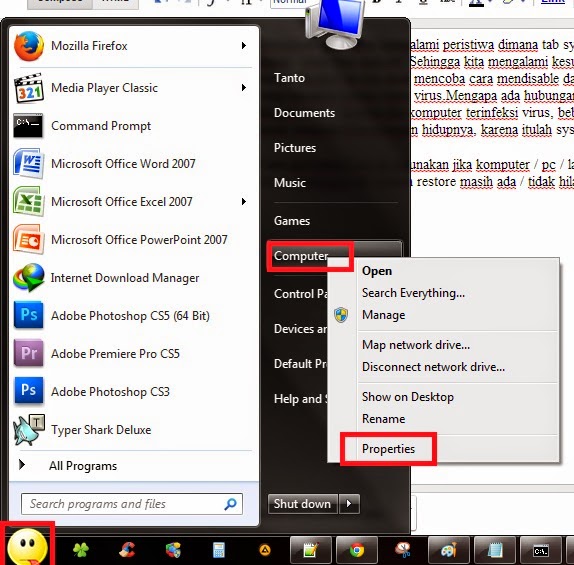
Kasus 1: Cara Mematikan System Restore. Jika ternyata system restore di Windows kamu aktif dan kamu ingin mematikannya, caranya sangatlah mudah. Start -> Klik kanan My Computer -> Properties -> System Protection -> Configure. Di Restore Setting pilih Turn Off System Protection -> Apply -> OK.
3 Cara Disable dan Enable System Restore Windows Pripun Carane
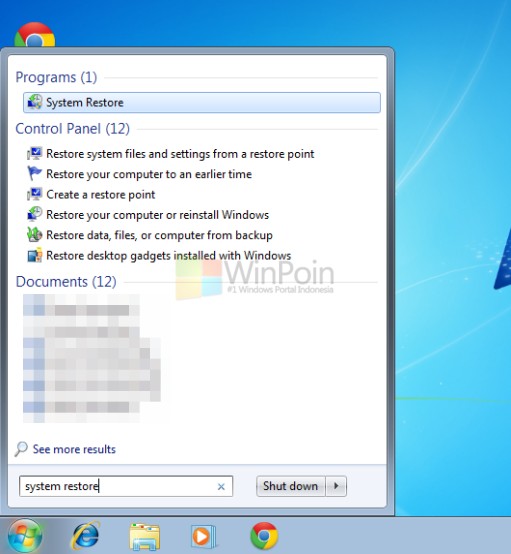
Berikut ini langkah-langkah mengaktifkan (enable) system restore Windows 10 secara manual: Klik menu Start dan langsung ketik "restore" (tanpa tanda kutip), hasil pencarian Create a restore point akan tampil, klik itu. Alternatif lain melalui Run. Tekan tombol Win + R bersamaan di keyboard. Kotak dialog Run akan muncul.

Cara Mengatasi System Restore Yang Macet atau Hang di Windows 7, 8 dan 10 YouTube
Cara Restore Windows 7. Pertama buka Start Menu kemudian ketikkan " System Restore", lalu klik " Sytem Restore". Tampil " System Restor e", kemudian klik " Next". Tampil restore point, pilih restore point untuk mengembalikan waktu sesuai dengan keinginan Anda. " Restore Point" ini berisi " backup " registry dan.
Cara Mematikan System Restore di Windows 7, 8 dan 10 (Lengkap)
3 Cara Mematikan Firewall Windows. Berikut langkah-langkah restore Windows 7 ke tanggal tertentu: Buka Start Menu. Ketik \\\"System Restore\\\" di kolom pencarian. Buka software System Restore dengan logo seperti di gambar. Source : Microsoft Support. Setelah program terbuka, pilih opsi \\\" Choose a Different Restore Point\\\" lalu.
Cara Menggunakan System Restore Di Windows 10, 8, 7 Lengkap zotutorial
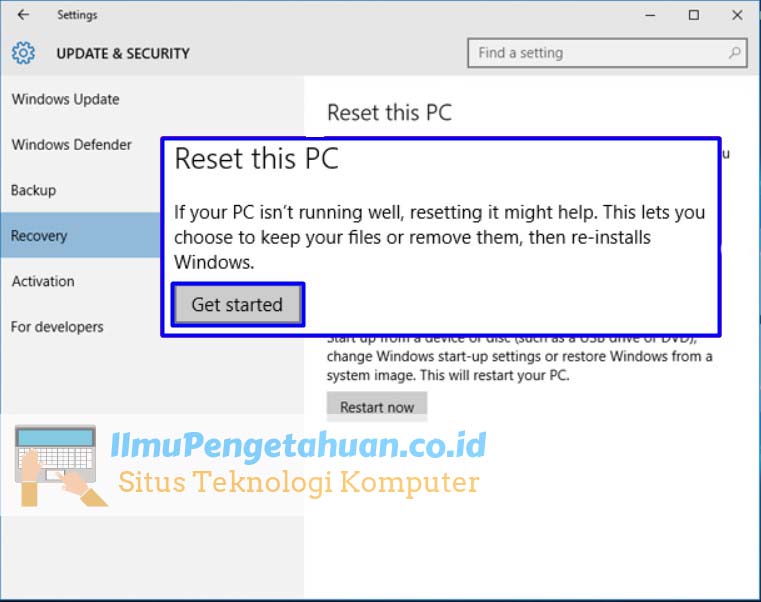
Cara tepat menanganinya adalah dengan menggunakan fitur System Restore. Untuk menggunakan System Restore, maka disarankan untuk mengecek Protection System harus dalam keadaan Aktif/On karena system restore tidak bisa digunakan jika masih dalam keadaan off. Hal yang perlu Anda ketahui, secara default status system restore masih dalam status Off.

How To System Restore In Windows 7 YouTube
Reboot your computer to enter Windows normally. Click the Start menu, right-click on Command Prompt, and select "Run as administrator". Type net stop winmgmt and press Enter. Then type winmgmt /resetRepository and press Enter. Reboot your computer one last time and then try to create a restore point.

Cara Mematikan System Restore di Windows 7, 8 dan 10 (Lengkap)
Meskipun Windows 10 hadir dengan beragam fitur yang menarik, namun tetap saja masih banyak pengguna komputer yang menggunakan Windows 7 sebagai sistem operasi andalan mereka. Tidak hanya itu saja, tidak sedikit pengguna yang beranggapan bahwa Windows 7 ini sangat mudah dioperasikan. Namun sayangnya pada awal tahun 2020 lalu, Microsoft telah memutuskan untuk mengakhiri dukungan terhadap Windows 7.

3 Ways to Use System Restore on Windows 7 wikiHow
System Restore di Windows 7 memungkinkan Anda untuk mengembalikan komputer ke waktu sebelum terjadinya masalah di komputer. Ada sejumlah alasan mengapa Anda harus menggunakan System Restore, termasuk jika terjadi masalah saat menginstal sistem operasi baru, pengandar (alias driver ), atau perangkat lunak (alias software ). Metode 1.
Cara Restore Windows 7 dengan System Restore MAN Lumajang
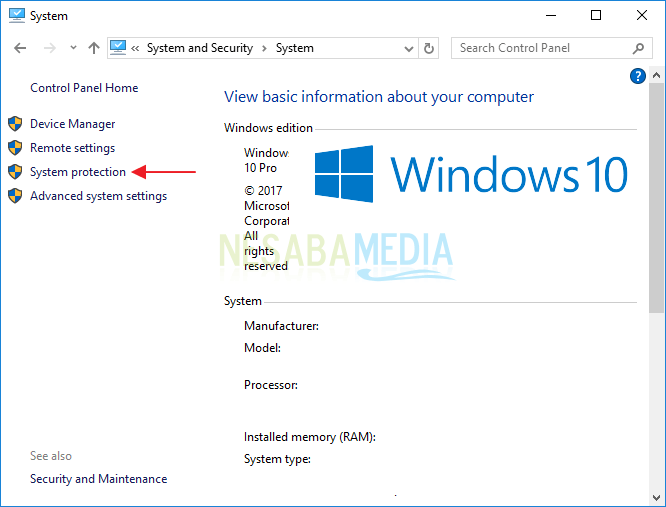
Use Windows 7 System Restore from My Computer. If you want to access System Restore outside of its normal parameters, you can "right-click" My Computer and click "Properties.". Now, click "Advanced system settings" in the left-hand menu. Click the "System Restore" tab. From here, you can turn on and off System Restore by.

Cara Mematikan System Restore di Windows 7, 8 dan 10 (Lengkap)
Click on the Start menu, type "restore", and click "Create a Restore Point". The System Properties dialog screen opens up. Click the Create button. Type in a description for the restore point which will help you remember the point at which is was created. The time it takes to create the restore point will depend on the amount of data, computer.
Cara Menggunakan System Restore Di Windows 10, 8, 7 Lengkap zotutorial
1. Buka menu "Start" . Klik logo Windows yang ditampilkan di pojok kiri bawah layar. 2. Tikkan system restore pada menu "Start". Setelah itu, komputer akan mencari menu titik pemulihan ( restore point menu ). 3. Klik Create a restore point. Pilihan ini ditandai oleh ikon monitor yang ada di bagian atas layar.

Cara Mematikan System Restore di Windows 7, 8 dan 10 (Lengkap)
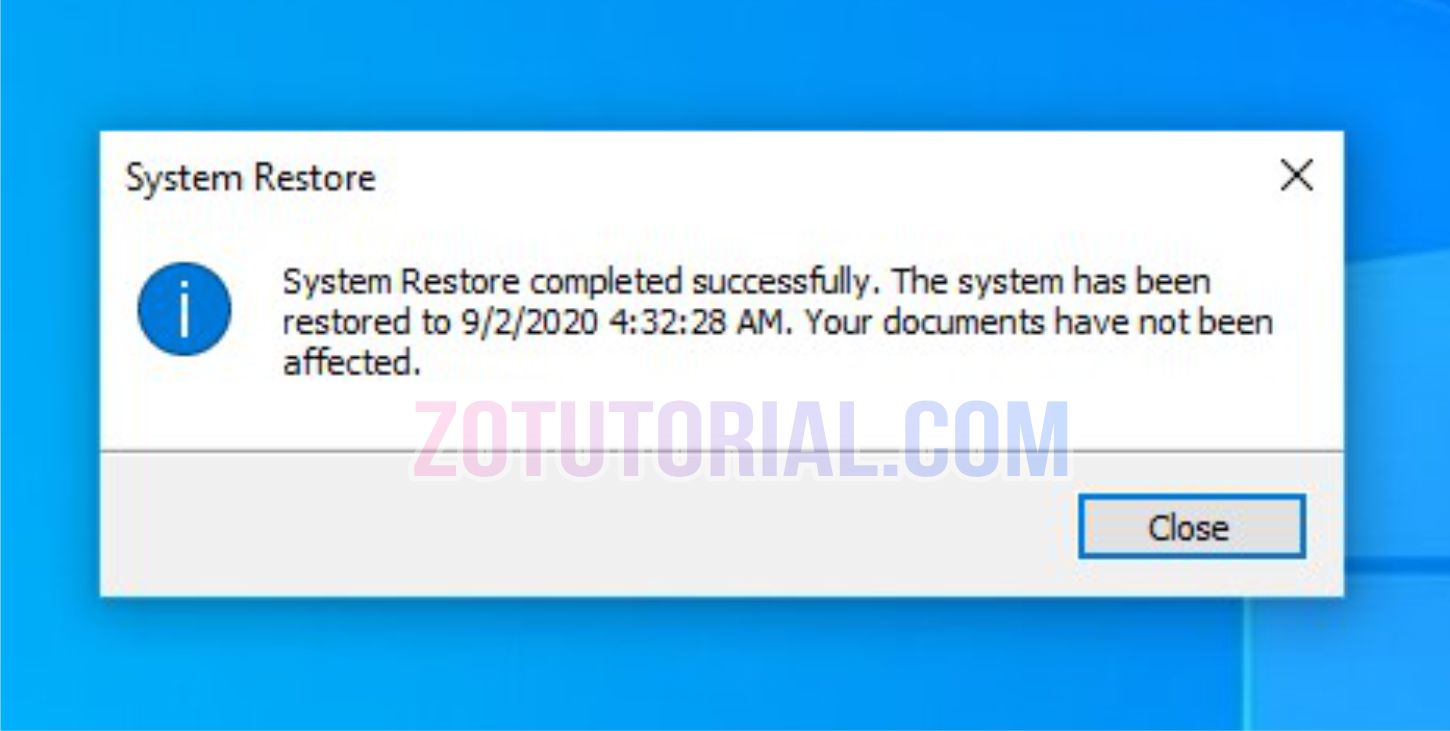
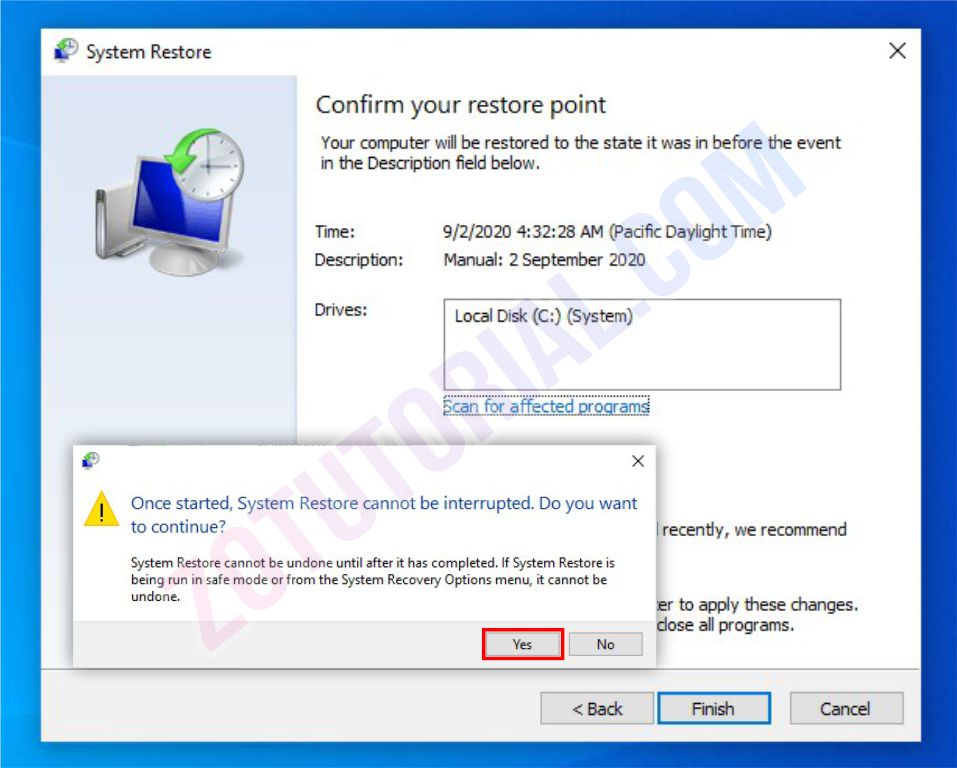
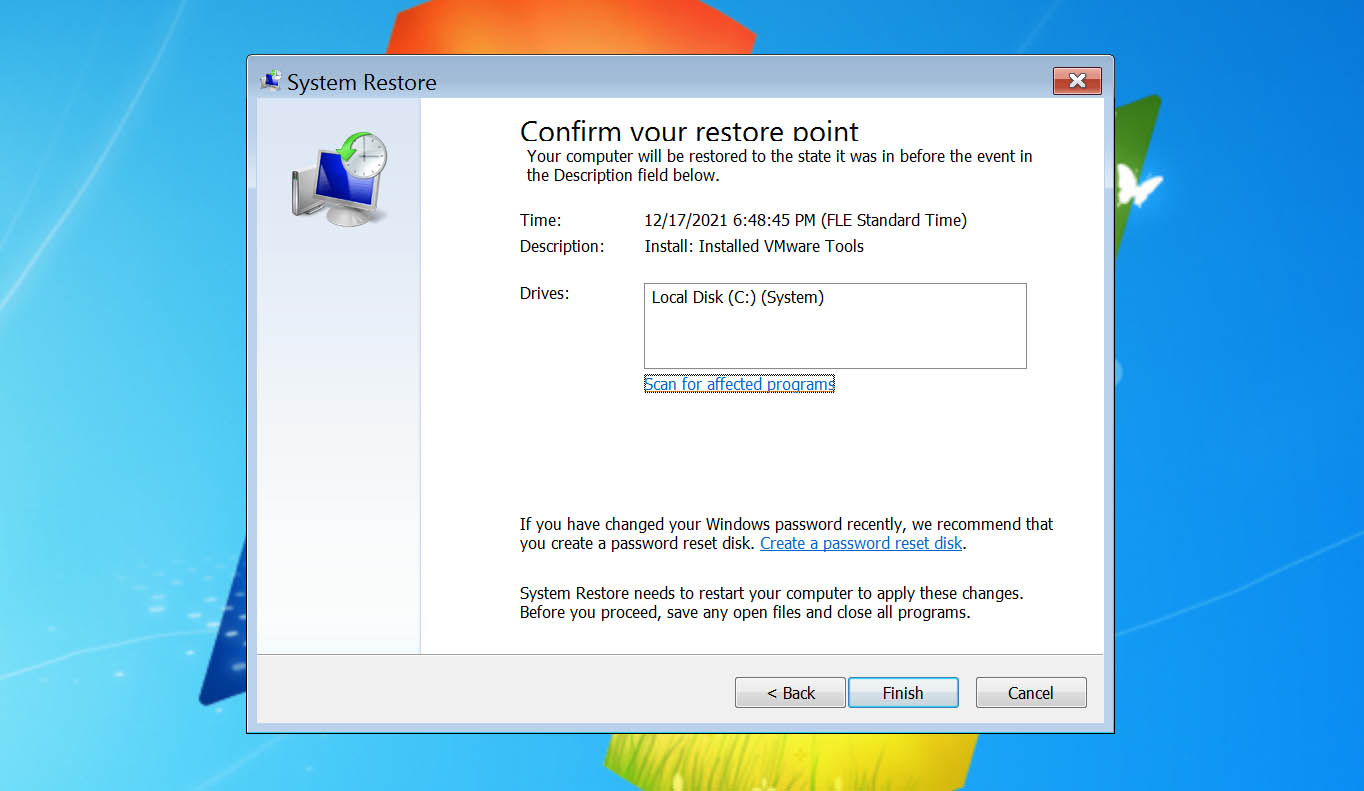
Click System Restore, and then click Next. The most recent restore point is the default choice and the best place to start. To choose a different restore point, click the Show more restore points check box, and then click a restore point. Click Next, and then click Finish to confirm your restore point. To start the restore process, click Yes.

How to Use System Restore on Windows 7 (with Pictures) wikiHow
Note that depending on your system this may take a while and Windows is going to restart. To create a System Restore point do the following. 1. Go to start and type Create a restore point in the search box and press Enter. 2. Click the Create… button. In the next text box, type a descriptive name for the your new System Restore Point, and.
How to Recover Files After System Restore on Windows 7 [Guide]
Klik System Restore. Klik Next pada jendela "Restore system file and settings" yang muncul. Pilih restore point yang Anda inginkan. Bila Anda ingin melihat restore point yang lebih lama, Anda dapat mencentang kotak "Show more restore points". Tips memilih restore point: Pilihlah restore point terbaru terlebih dahulu.

System Restore in Windows 7 Windows 7
Open Windows Explorer. Click the down arrow next to Organize. Click Folder and Search Options. Click the View tab. Uncheck Hide file extensions for known file types. Click OK. Dell Data Backup and Recovery Rename Shell extension: Navigate to: C:\Program Files (x86)\Dell Backup and Recovery\Components\Shell.